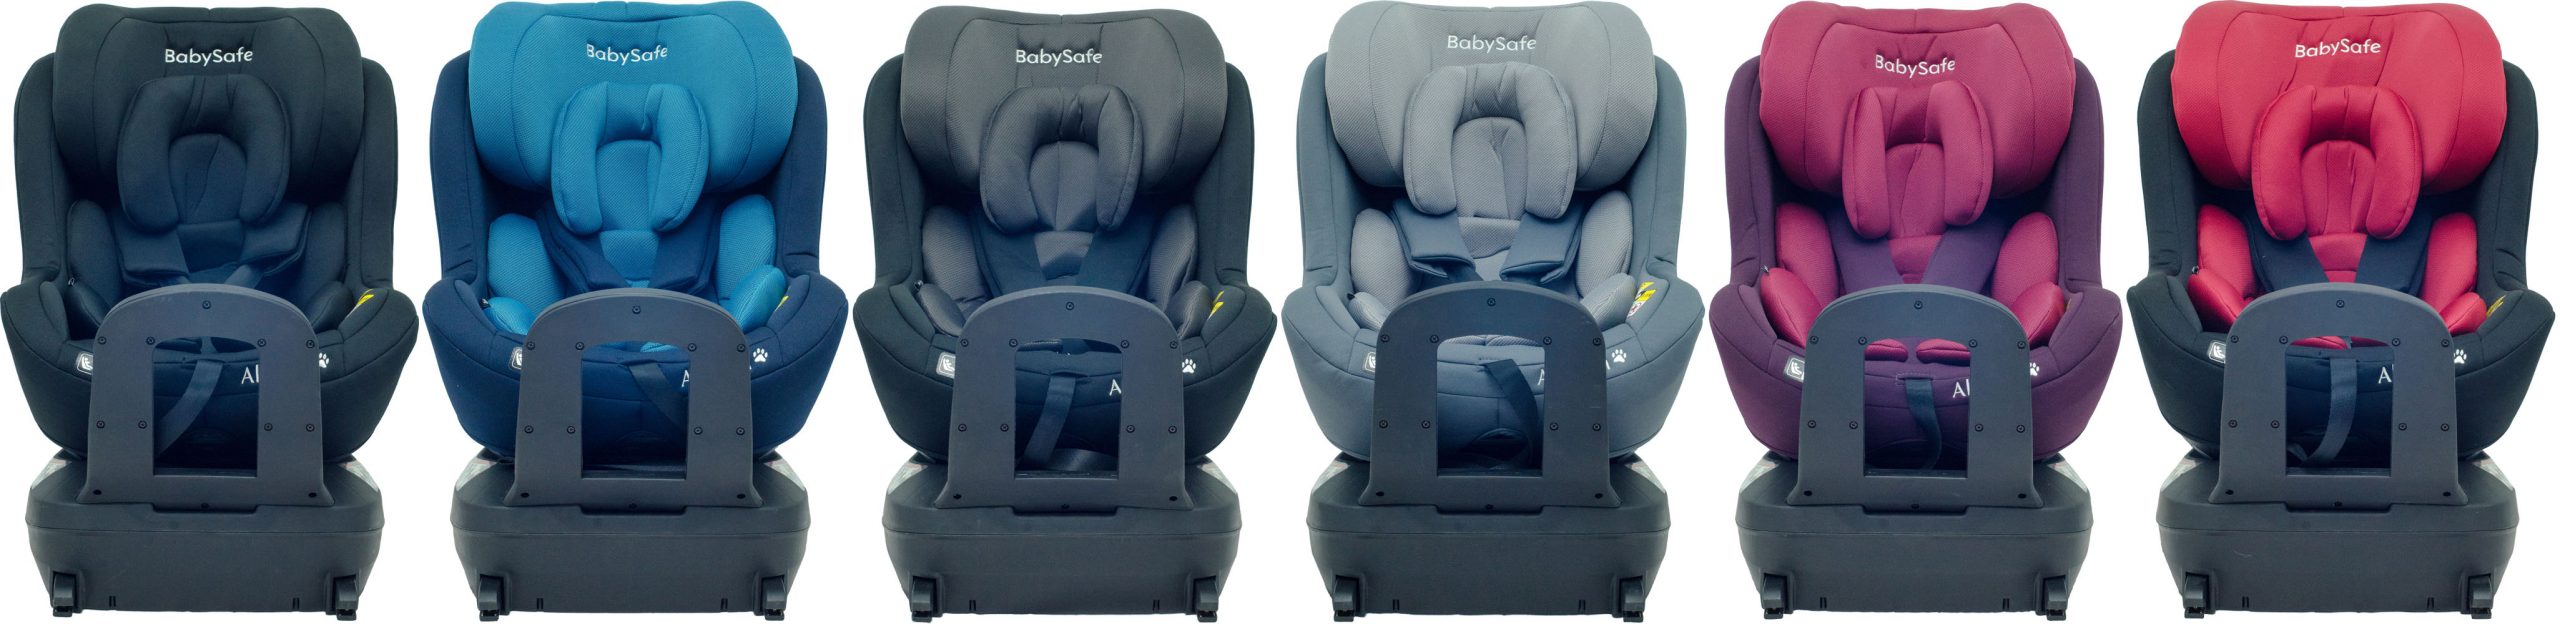
Good day mummies and daddies. Congratulations on choosing one of the safest baby car seat for newborn to 18kg. The i-Size standard is stricter than the ECE standard so it should provide improved safety for your precious baby. However, proper installation and usage is required to maximise the safety provided by this product. So, this step by step guide will help you to install the BabySafe Alaskan properly.
Let’s start with the basic controls that you’ll be using everyday.
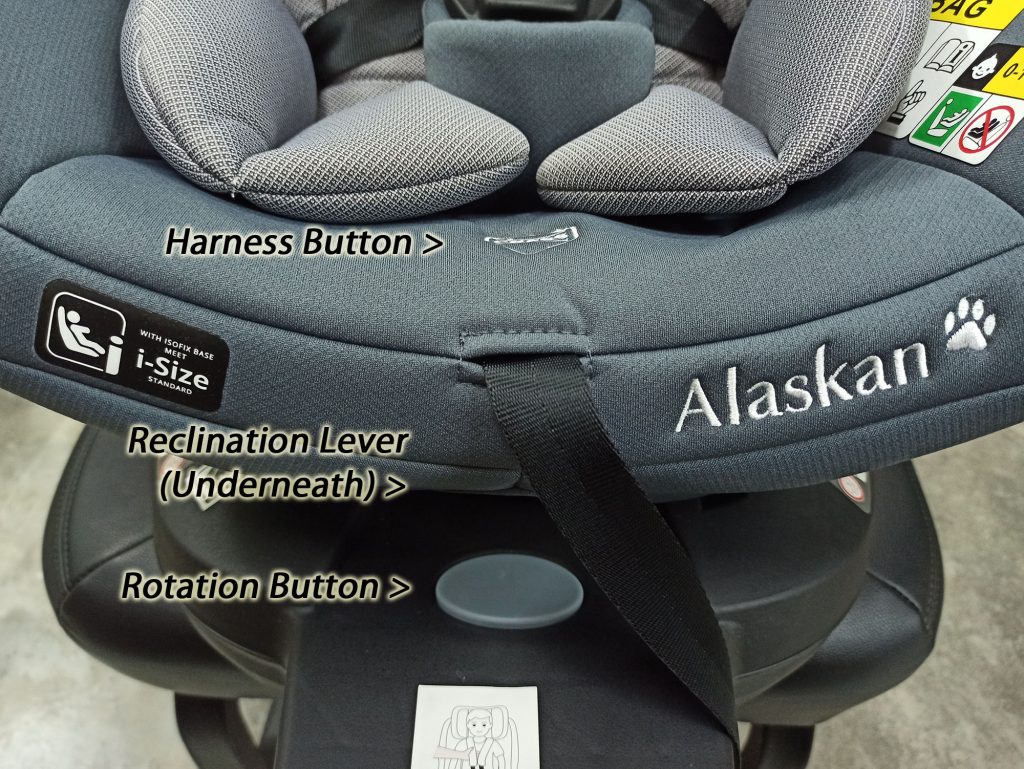
Next, to the reclination lever. This BabySafe Alaskan is designed to be easy to understand. Only 2 settings which is upright for loading, unloading, and rotating the car seat. And reclined for comfort for your baby. Some people might said that this reclined setting is too upright. But we have to stress that being upright doesn’t it’s uncomfortable. For example, Mercedes Benz back seats have the tendency to be upright, but it’s comfortable and supportive. Also, the stricter i-Size standard also limits the lean angle the engineers can achieve.

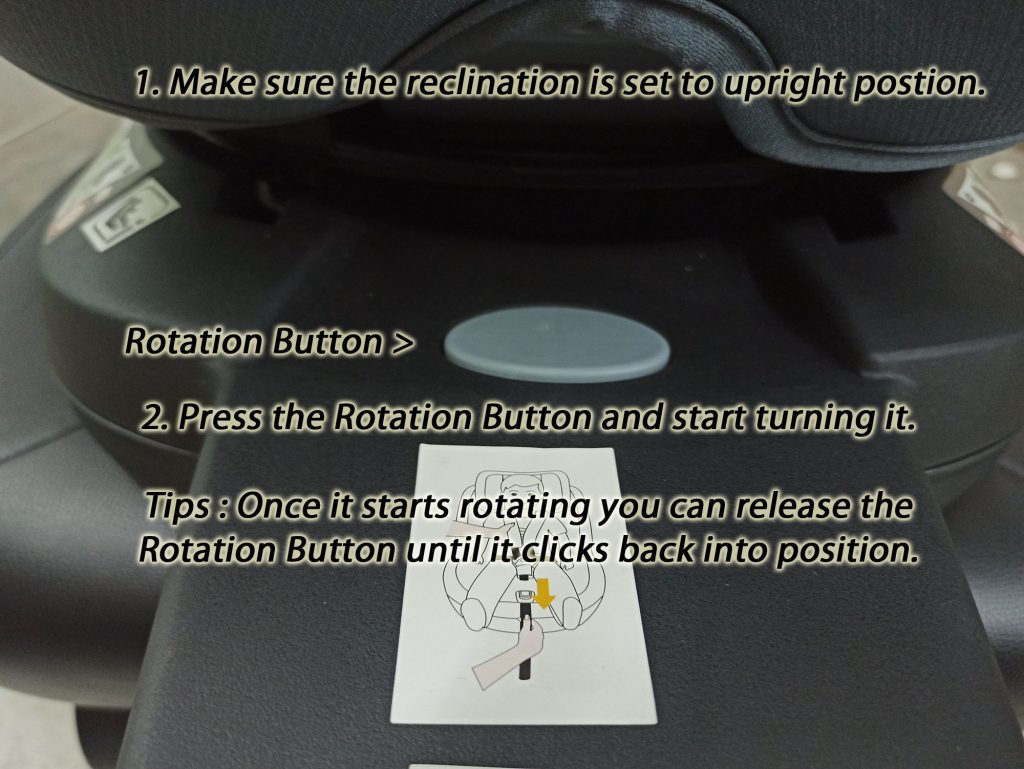
Next is the rotating button. Please bear in mind that the seat has to be in upright position for the rotation to work.
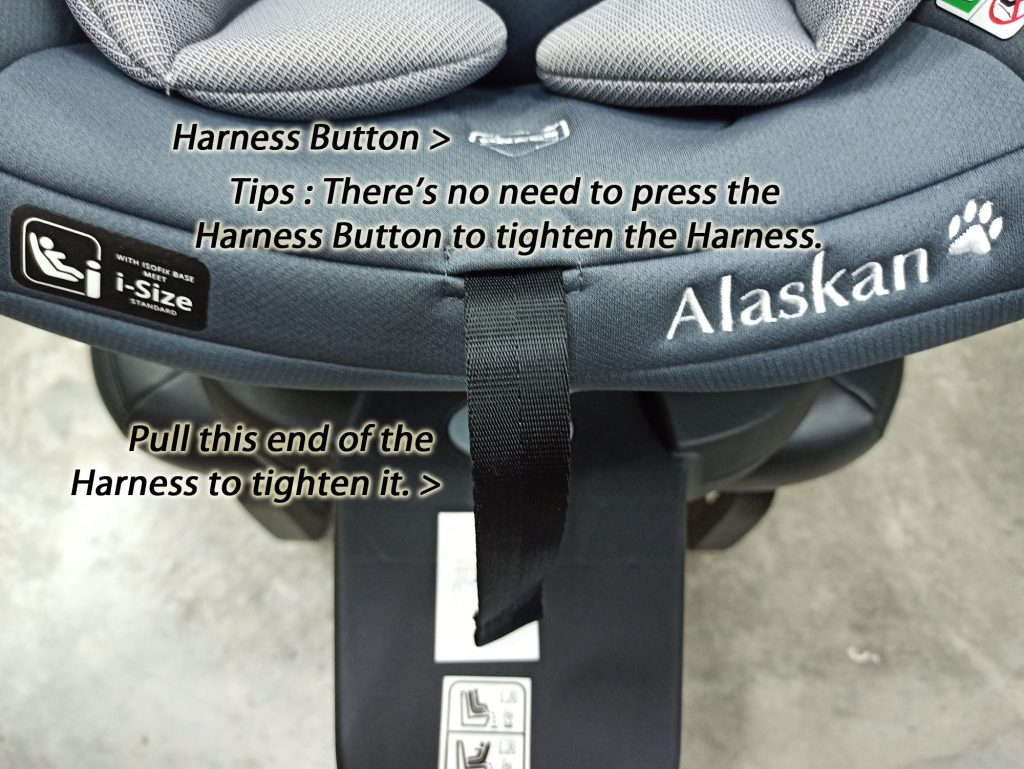
Next is the Harness Release Button. Loosening the harness requires you to press the button, and pull the harness at the same time. Please note that the shoulder pads are designed to be at the shoulder position at all time and it’s not supposed to be extending like the harness.
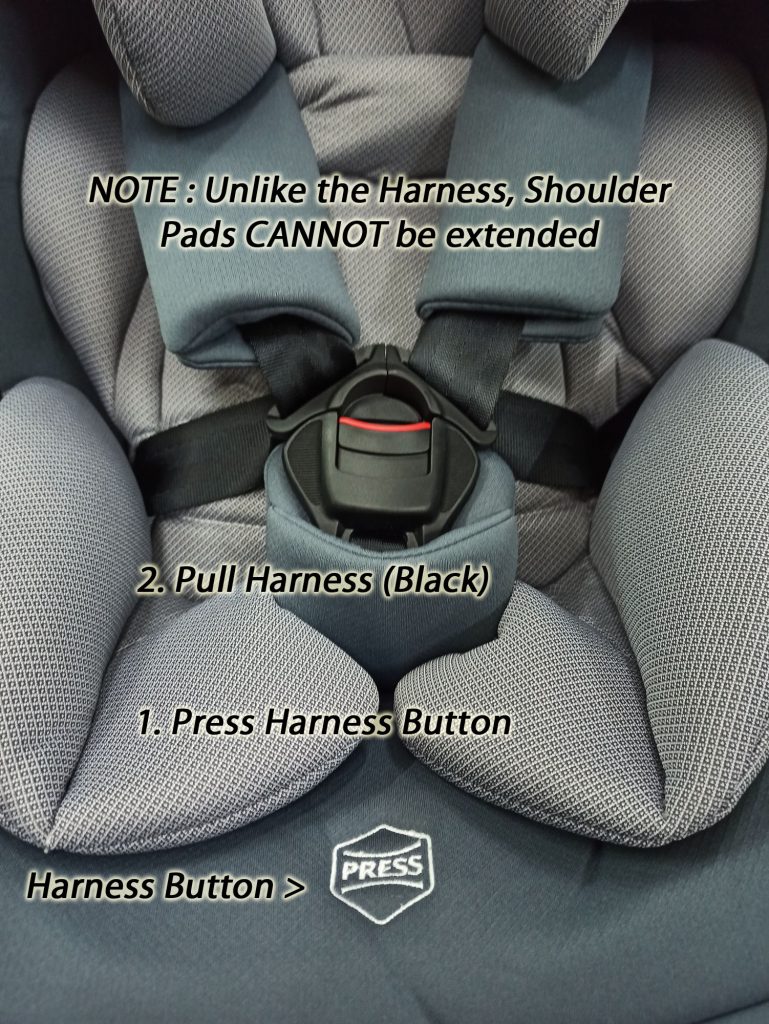
By adding in a simple one way clamp, tightening the harness only requires you to pull the harness without pressing the Harness Button.
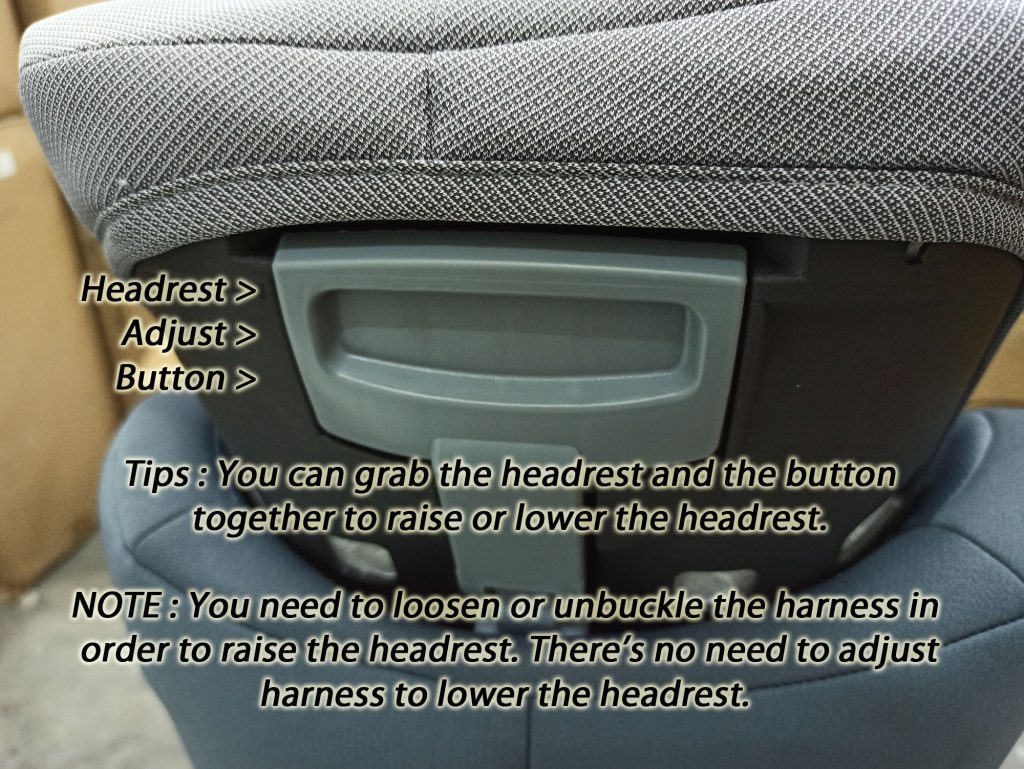
Lastly, the headrest, which is the least adjusted daily controls. Please bear in mind that the harness and headrest is interconnected, so you need to loosen the harness or unbuckle it to raise the headrest. However, there’s no need to loosen the harness or unbuckle it if you’re lowering the headrest.
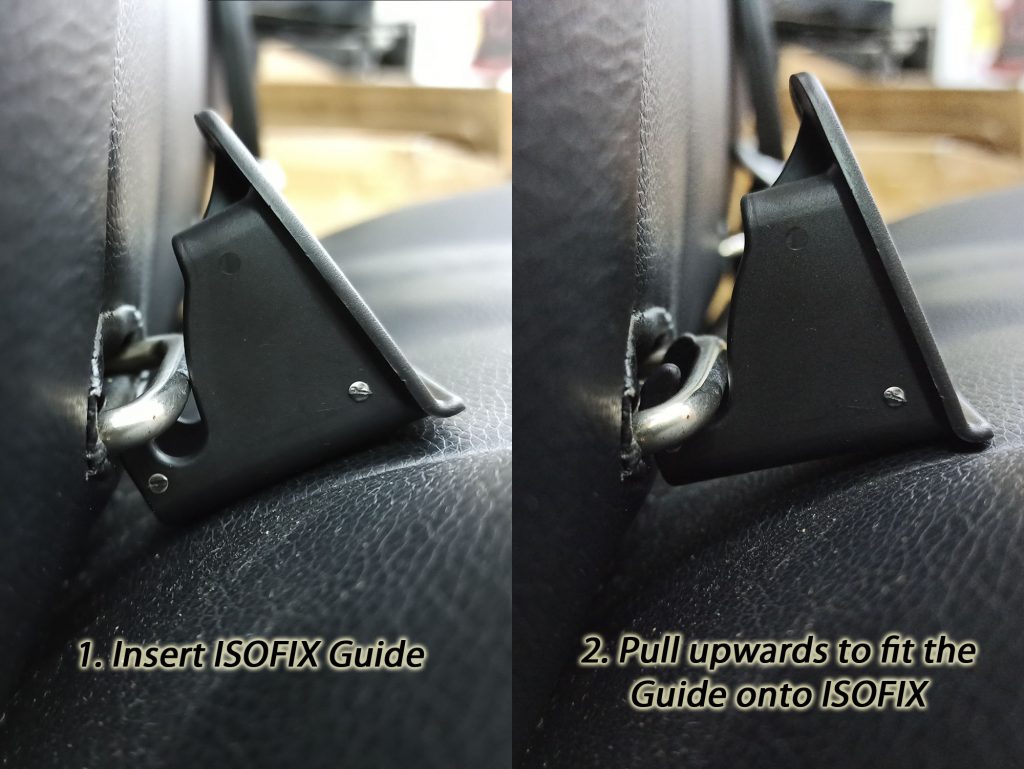
So that’s all about the basic controls that you’ll use every day. Next on is the installation guide. First, let’s start with the optional ISOFIX Guides that come with all Meinkind ISOFIX car seats.
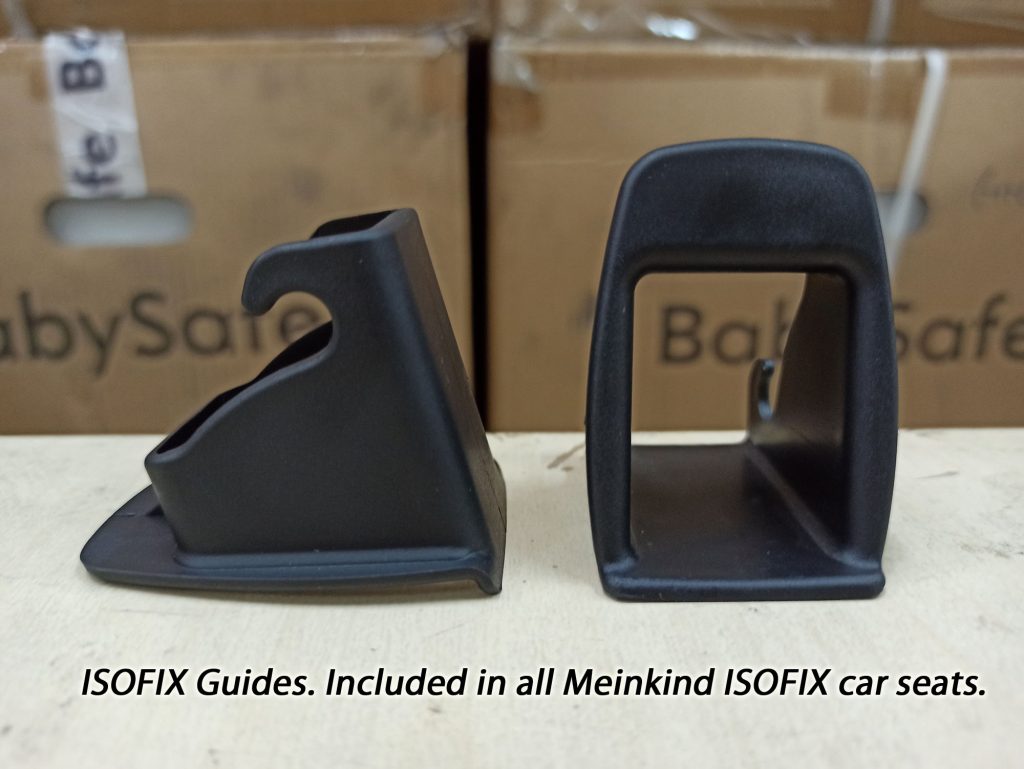
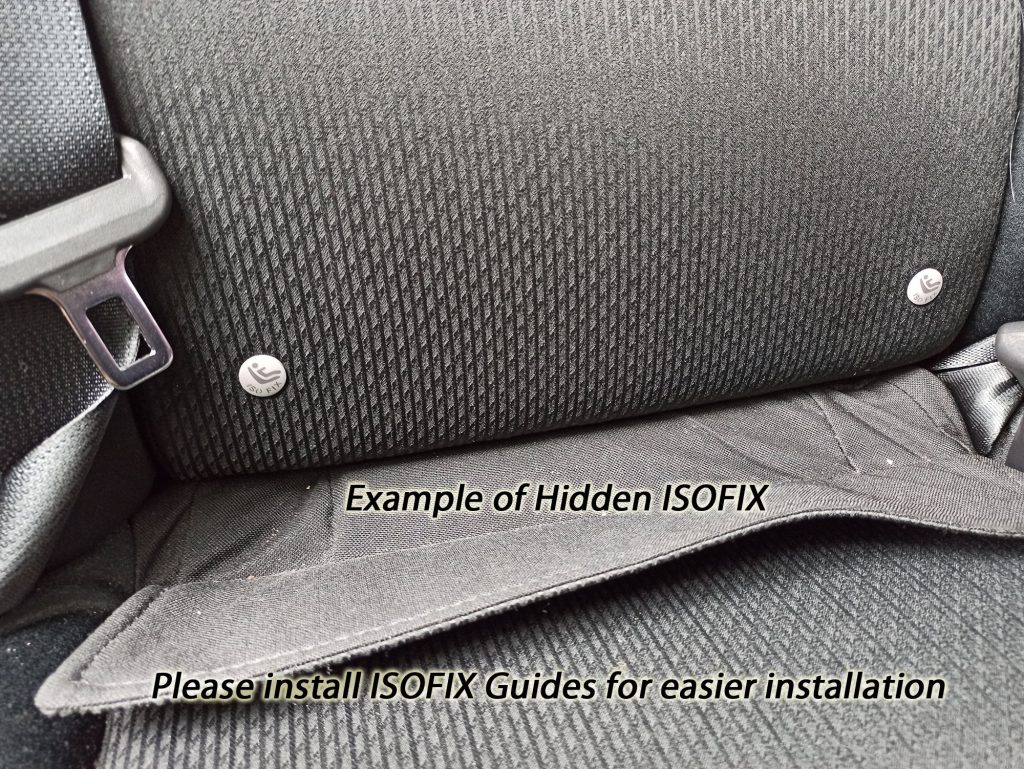
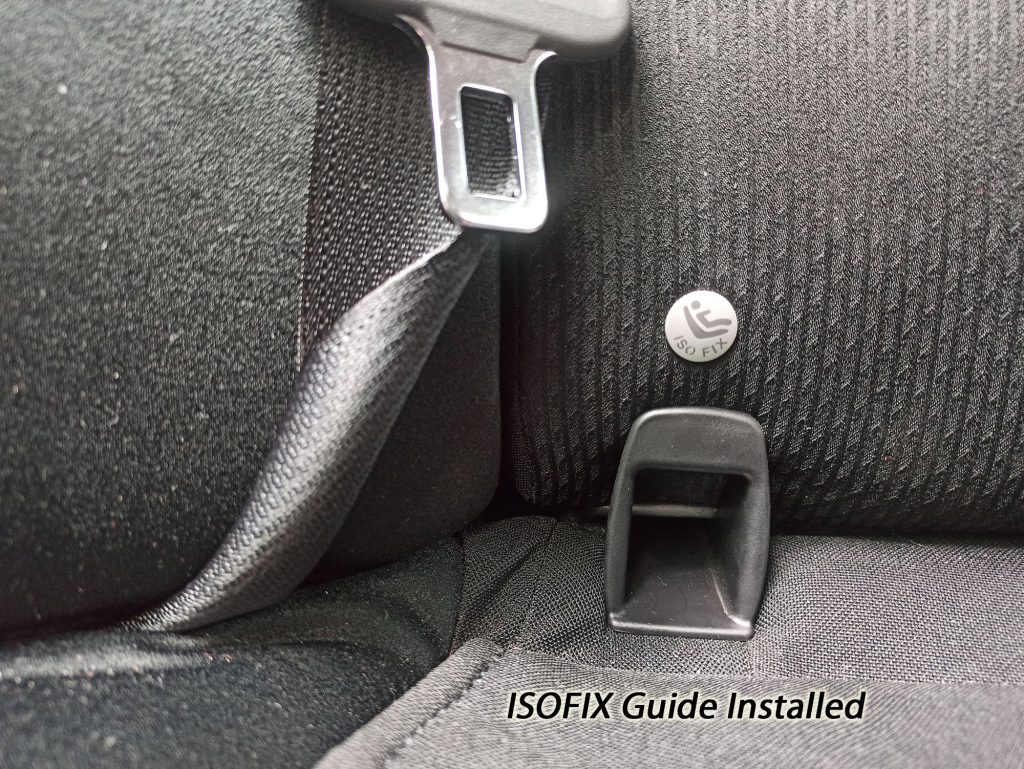
For cars with Hidden ISOFIX, you need to install the ISOFIX Guides first in order for the ISOFIX Legs to slide in easily. Or if you’re having a leather seat on your car, we recommend you to install the ISOFIX Guides to avoid scratching your leather seat.
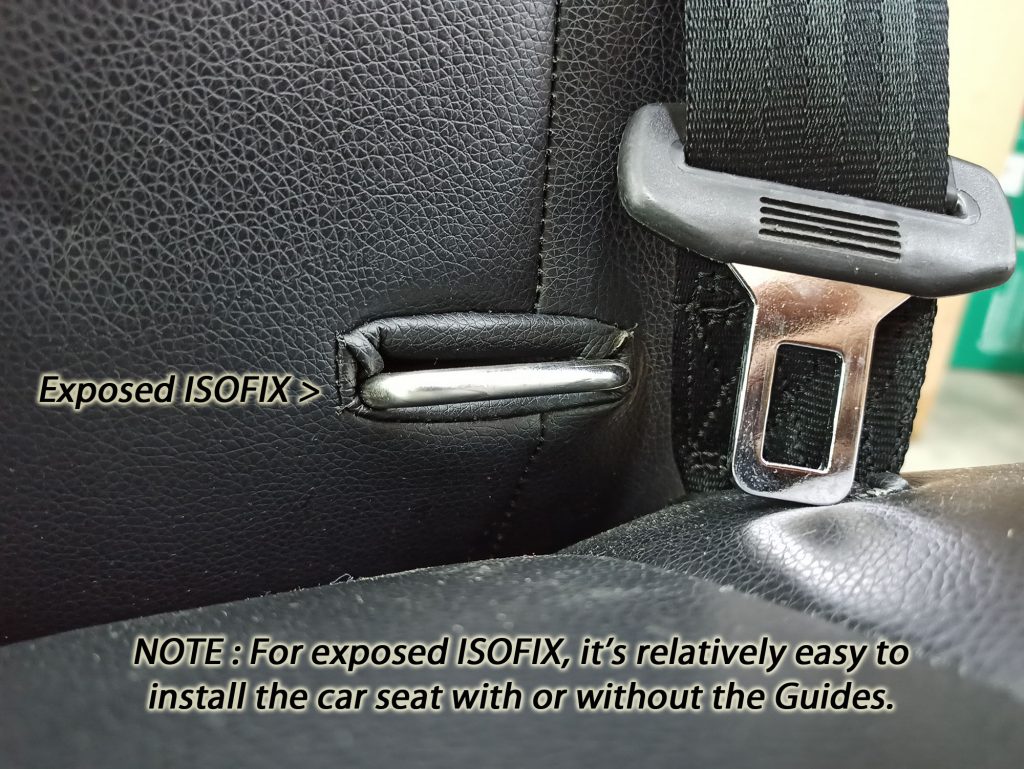
For exposed ISOFIX, it’s relatively easy to install the car seat with or without the ISOFIX Guides. So it’s up to your preference.
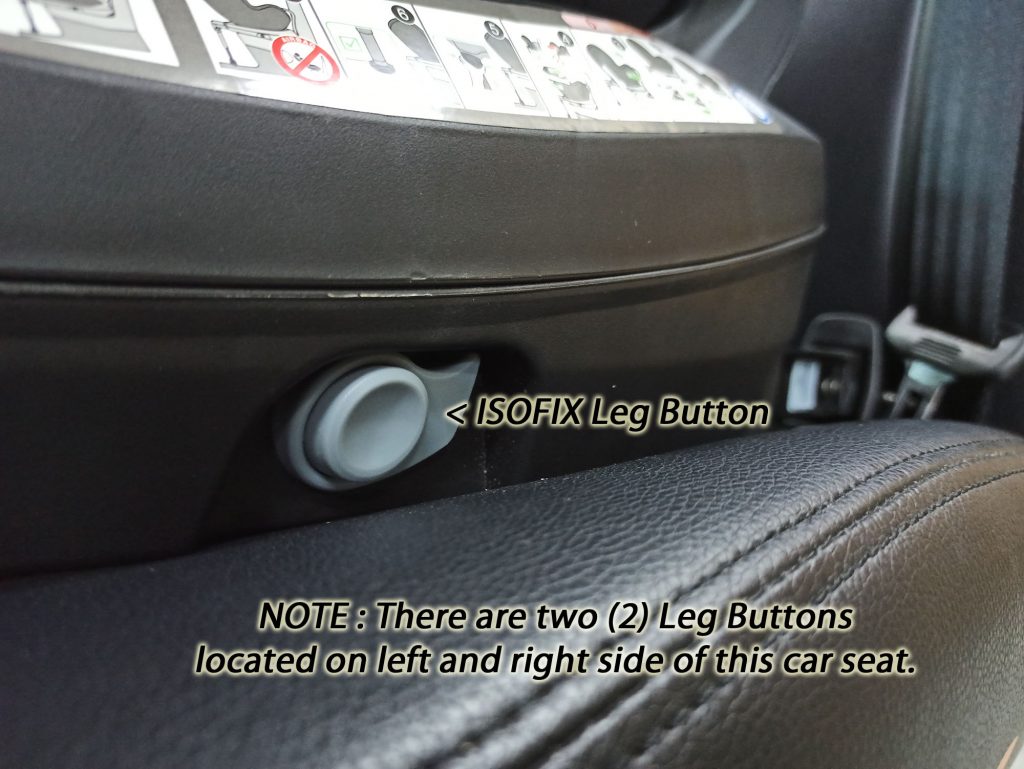
Next, you need to press the ISOFIX Legs Buttons to extend the ISOFIX legs. For this particular model, the left leg and right leg are controlled by two (2) buttons located on both sides.
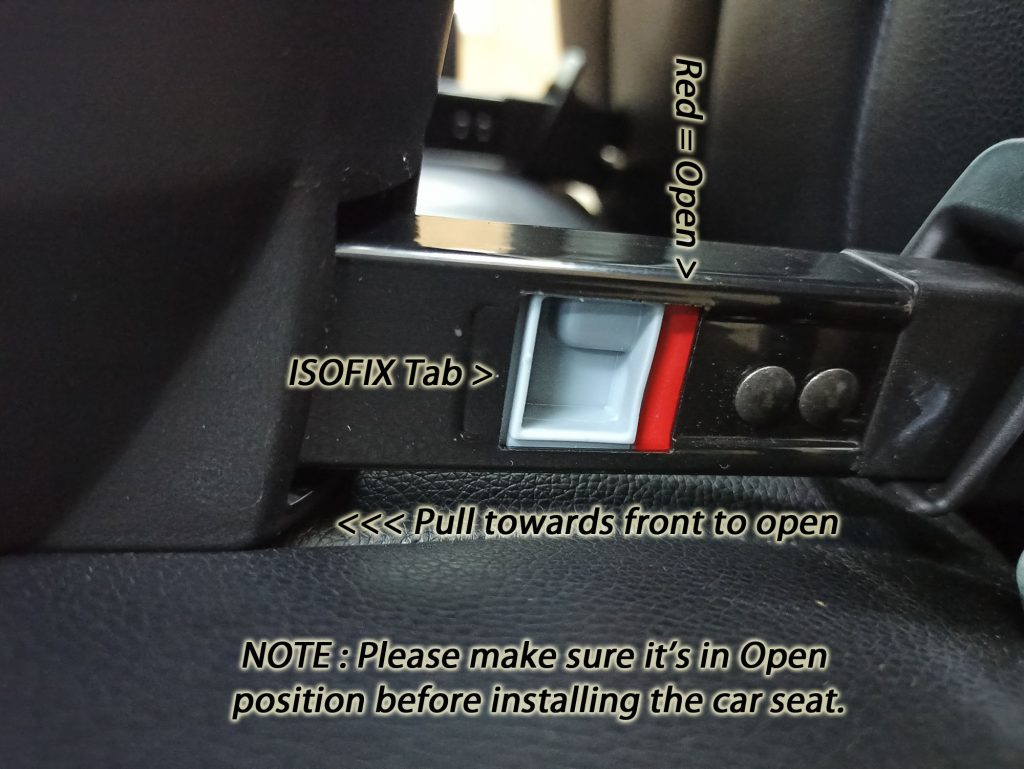
Before you start pushing the ISOFIX legs into the Guides, please make sure the ISOFIX is in Open position.
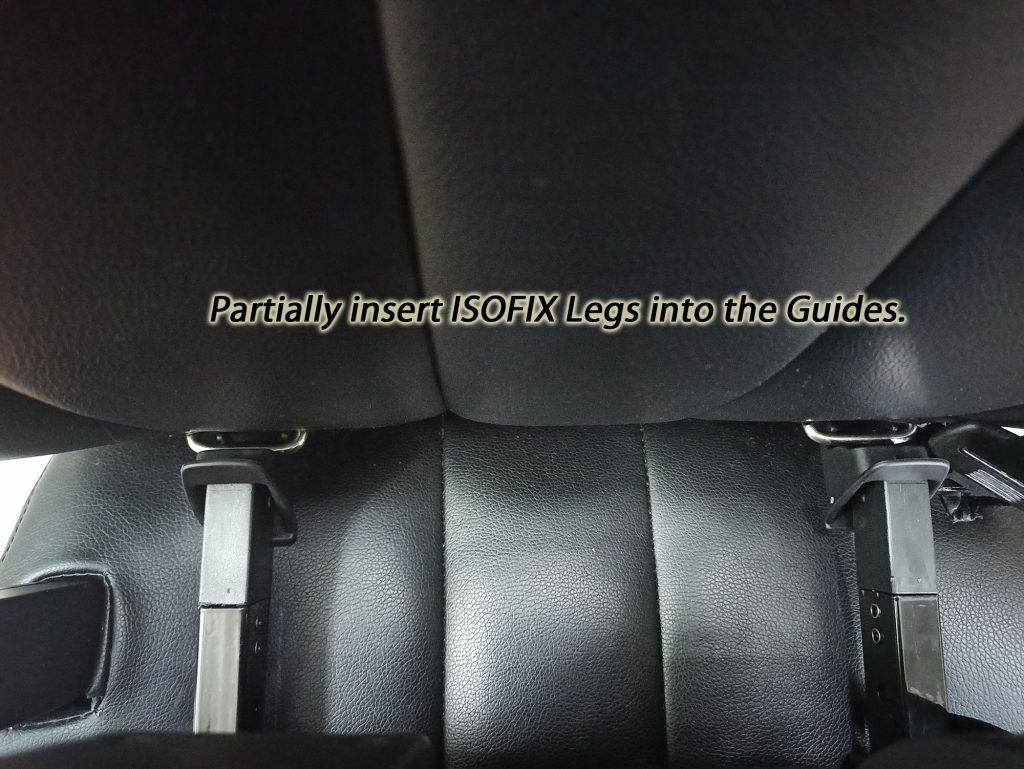
For easier installation, we suggests partially insert both Legs into both Guides without locking it.
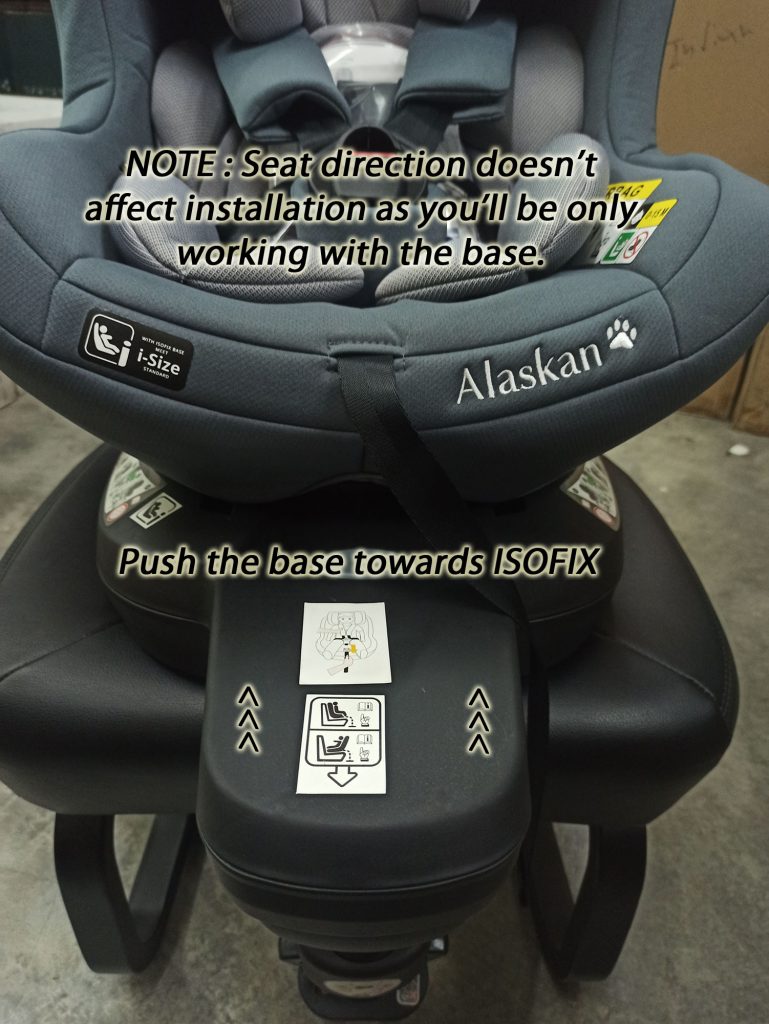
For easier locking the ISOFIX, we recommend pushing the Alaskan base from the front. If you had done the previous step correctly, you shouldn’t need to use excessive force to lock the ISOFIX. You might only hear one locking click as both the ISOFIX can lock at the same time.
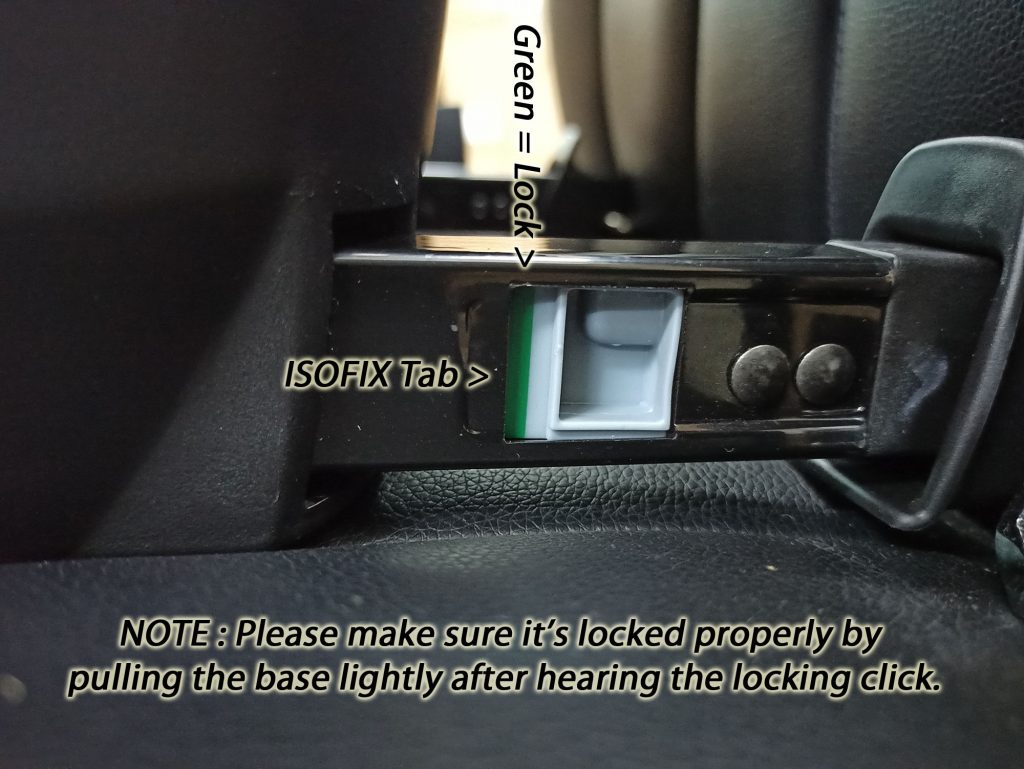
Now, check if both the ISOFIX is locked properly into position. First you need to see the Green part of the ISOFIX tab, then you can lightly pull the base to ensure it’s locked in place.
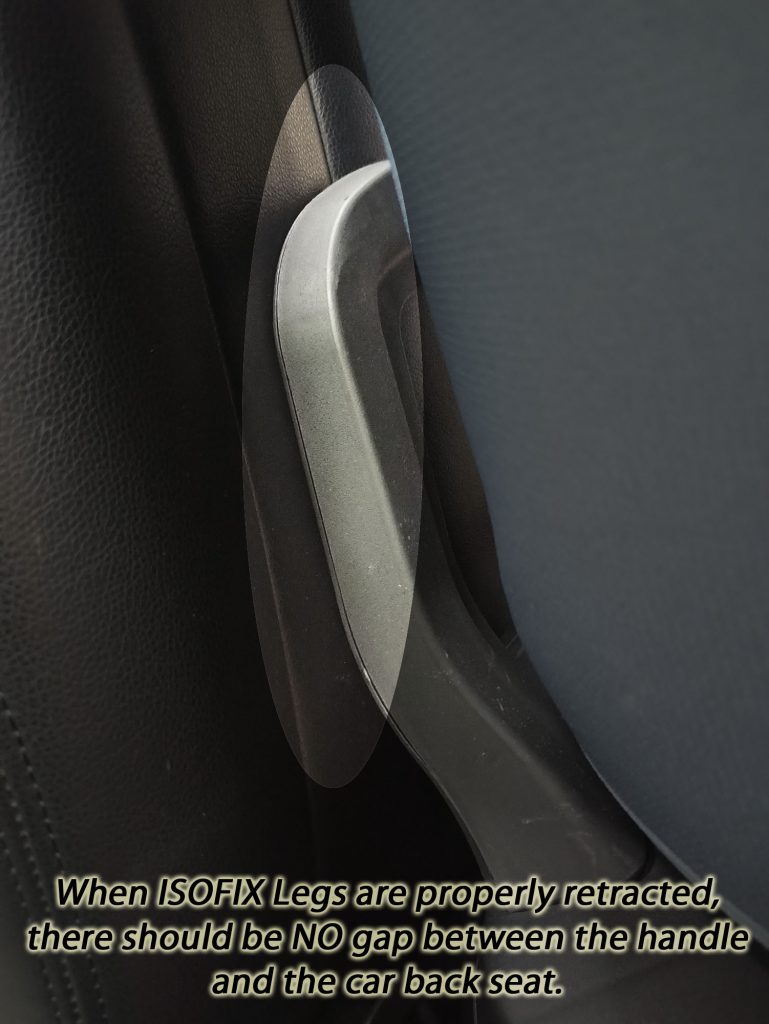
After ensure the ISOFIX is properly locked. You can now press the ISOFIX Legs Buttons to retract the legs. You should be pressing both buttons at the same time while pushing the whole baby seat until it leans against the car back seat.

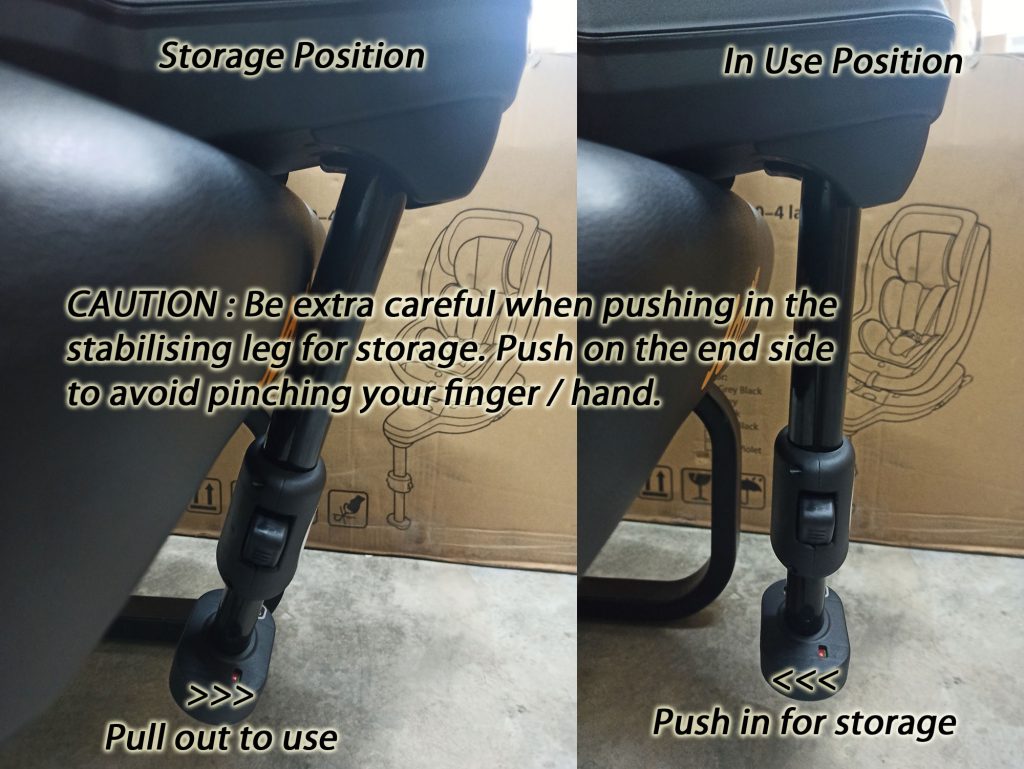
Two more steps and you’ll be going for a ride with your baby. So hang on with us. Now pull out the stabilising leg to In Use Position.
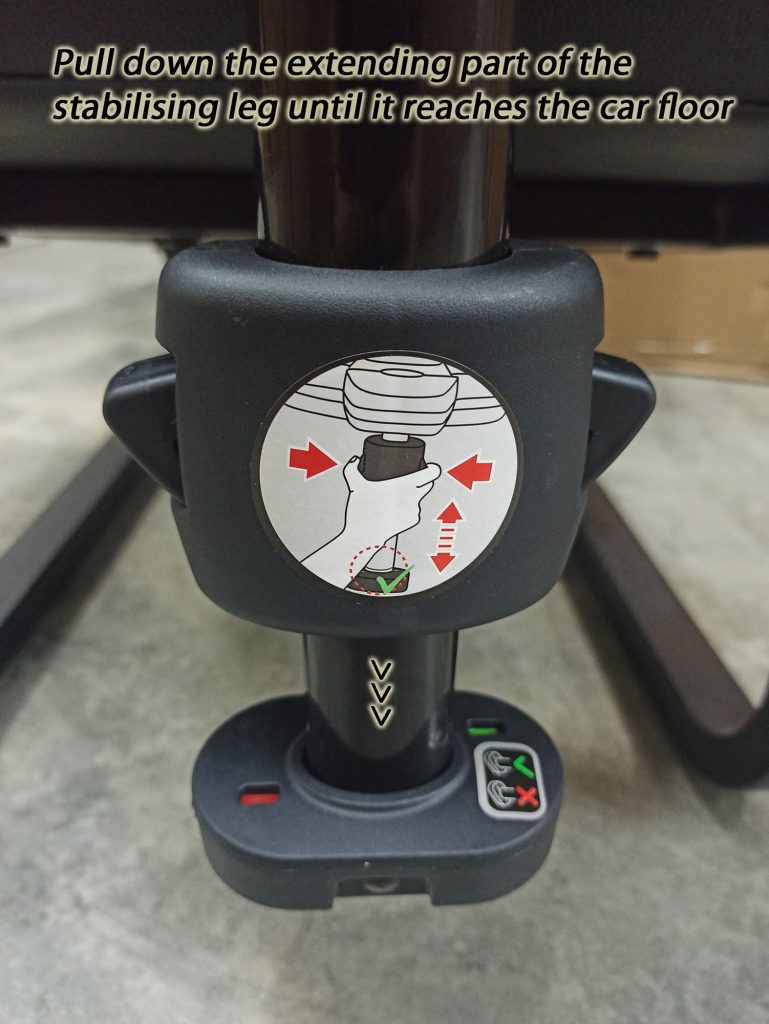
Now on to the last step. Pull down the stabilising leg to reach the car floor.
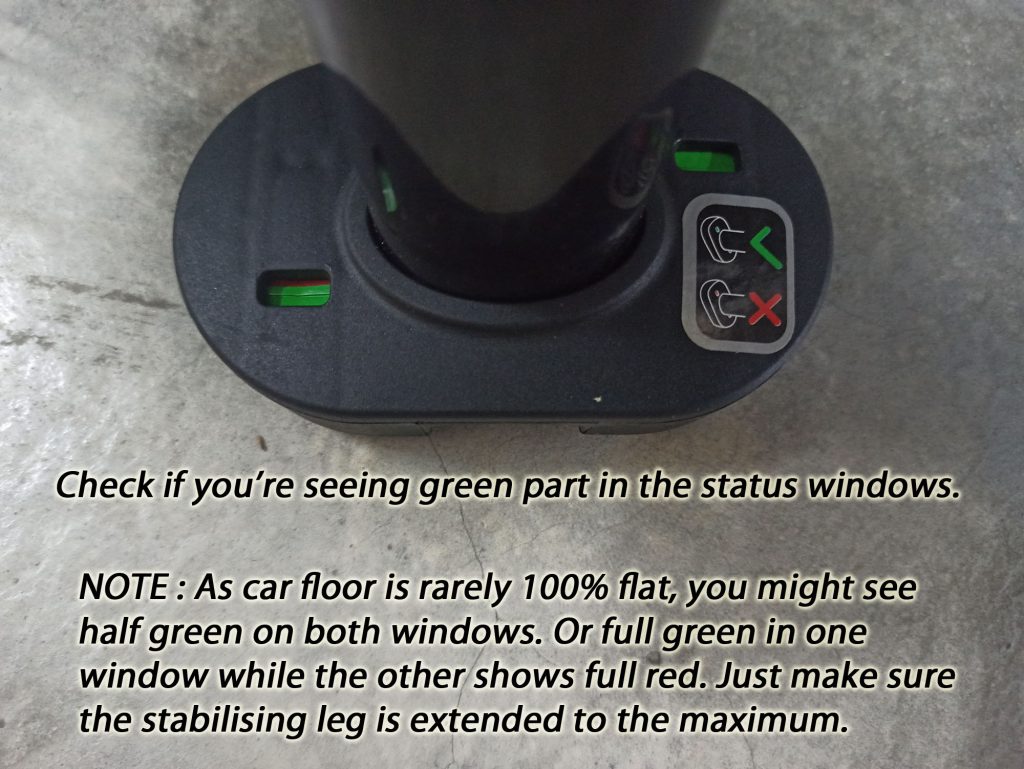
Last check on the stabilising leg status windows, and you’re good to go.
Do let us know if you have any question. We’re still improving on our installation guide and we’ll be happy to hear your suggestions. Thanks for reading and installing Meinkind BabySafe Alaskan.